.png?width=200&height=32&name=Logo_amaran_Blue_20240811a%20(3).png)
This guide covers powering, mounting, and turning on your amaran Halo 60x or amaran Halo 100x for the first time. Before you begin, confirm all included accessories are present. See the Overview for the full box contents.
1. Power Supply
Both lights support two power methods: the included AC power adapter, or an external USB-C PD power supply.
Method 1: Included AC Adapter
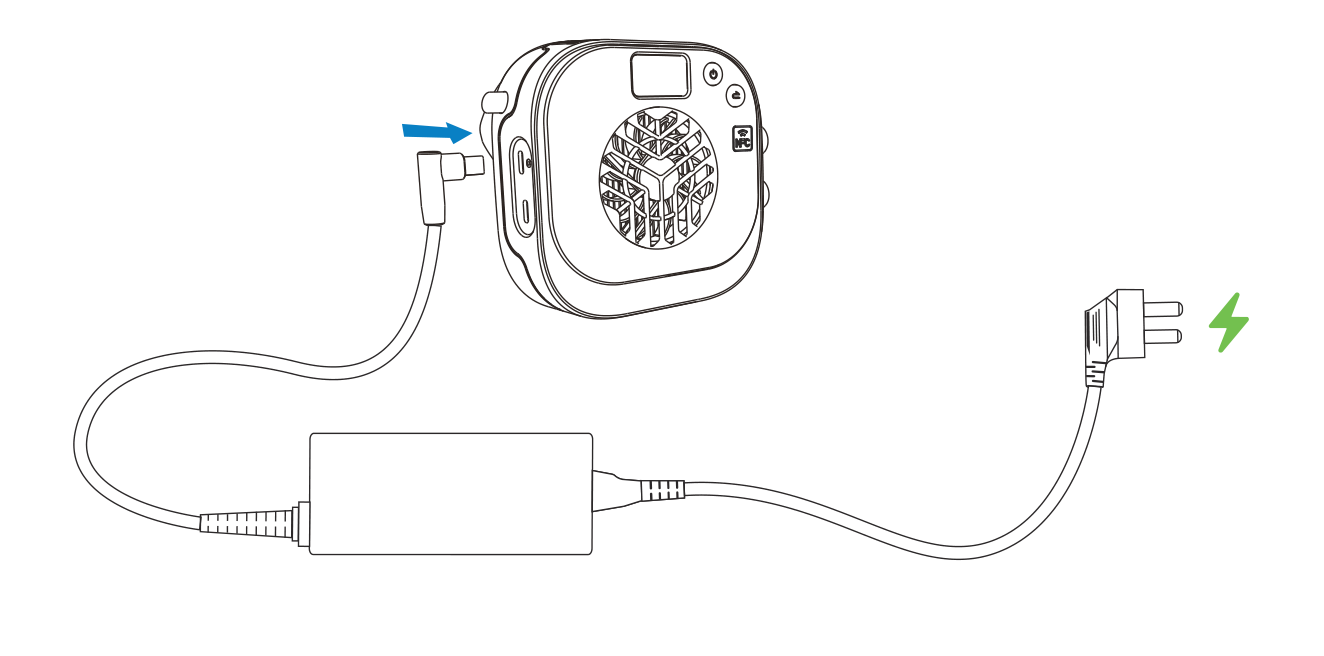
The Halo 60x is powered using the included amaran AC to USB-C 65W power adapter. The Halo 100x is powered using the included amaran AC to DC 100W power adapter. Connect the adapter to the light's charging port, then plug the AC cable into a properly grounded outlet.
Method 2: External PD Power Supply
You can also power the light from another PD power supply or power bank. Plug the output of the PD device into the light's USB-C Charging Port. You can use the USB-C port of the amaran Peak or amaran Peak 75 battery to power the fixture.
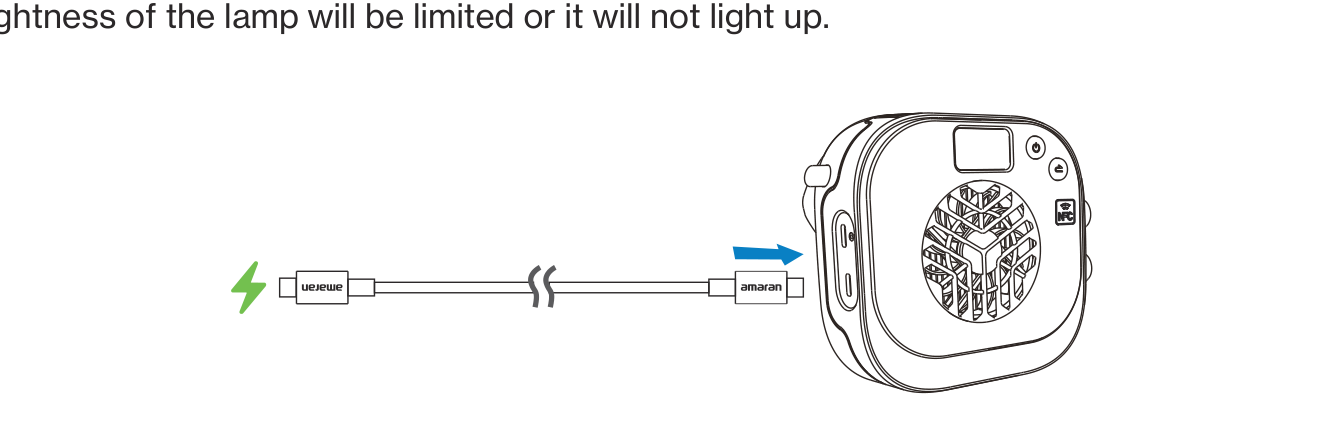
Important: The product supports USB PD 3.0 and above but is not compatible with some third-party private charging protocols. If the selected supply cannot power the light at full power, the brightness of the lamp will be limited or it will not light up, and a pop-up window will appear on the display screen.
Powering from an amaran Peak Battery Grip
Use the amaran Ace E-Lock Adapter (supports 1/4" and 3/8" threaded mounts, sold separately) to connect the fixture to a battery grip:
- Rotate the knurled adjustment dial on the adapter to align the 1/4" screw, then thread it into the mounting hole on the bottom of the fixture.
- Align the Ace E-Lock interface on the adapter with the Ace Lock latches on the amaran Peak or amaran Peak 75.
- Press straight downward until you hear a click, indicating a secure connection.
- For the amaran Peak 75, move the locking lever to the right to the locked position to complete the attachment.
To remove: For the amaran Peak, press the blue release button and pull the battery downward. For the amaran Peak 75, first press the blue button on the locking lever and slide it fully to the left, then press the blue release button and pull the battery downward to disconnect.
2. Power On and Off
After connecting to power, short press the Power Button to turn the light on, and short press it again to turn it off. The light starts in CCT mode by default.
A power-on icon appears on the menu screen once the light is connected to power. It disappears after 30 minutes or when the fixture is turned on.
The first time you power on the light, you can choose your preferred language. Rotate the CCT knob to select English or Chinese, then click the CCT knob to confirm.
3. Mounting the Light
With the mounting bracket installed on the light, place the end of the bracket onto the light stand and turn the locking knob to secure it in place. Adjust the angle of the light, then turn the tilt adjustment knob to lock it.
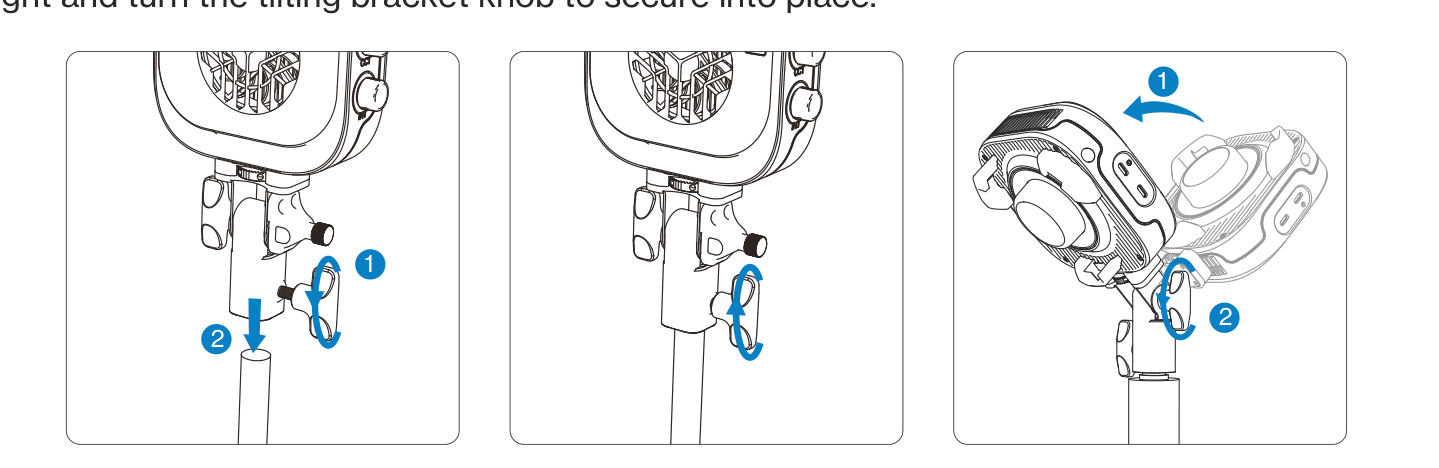
The included 1/4-20in to Baby Pin Tilt-Adjustable Adapter fits standard Baby Pin light stands, includes an umbrella holder for shafts up to 9mm, and provides tilt adjustment.
4. Installing a Bowens Mount Modifier
Both lights use a standard Bowens Mount:
- To install: Align the Bowens Mount pins of the modifier with the Bowens Mount of the fixture, insert the modifier, and rotate clockwise. Installation is complete when the Bowens Mount Release Button pops out.
- To remove: Press and hold the Bowens Mount Release Button on the corner of the light, then rotate the modifier counterclockwise to remove it.
When using a modifier other than the standard accessory, confirm compatibility with the fixture on the official amaran website.