.png?width=200&height=32&name=Logo_amaran_Blue_20240811a%20(3).png)
This guide covers charging your amaran Go, mounting it to your phone or another surface, and powering it on for the first time. For the on-device buttons, light modes, and app control, see [amaran Go] Operation & Controls.
Charging
The amaran Go has a built-in 800mAh rechargeable battery and charges over USB-C.
- Connect the included amaran USB-C Charging Cable (50cm) to the USB-C Charging Port on the bottom of the light.
- While charging, the indicator lights flash in order. Once the light is fully charged, all 5 indicator lights remain on.
A full charge takes approximately 70 minutes (0% to 100%).
Mounting Your Light
As a MagSafe and Qi2 magnetic mount compatible light, the amaran Go can be securely attached to a compatible phone in less than a second without additional tools. Align the MagSafe Ring on the back of the light with the magnetic ring on your phone and let it snap into place.
Using the MagSafe Adapter Sticker
An amaran MagSafe Sticker is included for use with non-MagSafe compatible devices and laptops.
- Remove the protective film on the back of the MagSafe Sticker.
- Place it onto your desired mounting surface.
- Press the sticker down for 10 seconds to ensure it is firmly attached. You can then snap your light on and start creating.
Choosing an Orientation
When filming content with your front camera, flip the amaran Go open and ensure the main light is facing forward for the best results. When filming your surroundings or other subjects with your rear camera, collapse the light.
Powering On and Off
The power button is located on the bottom of the light. Toggle the power button to the right to power on, and toggle to the left to power off.
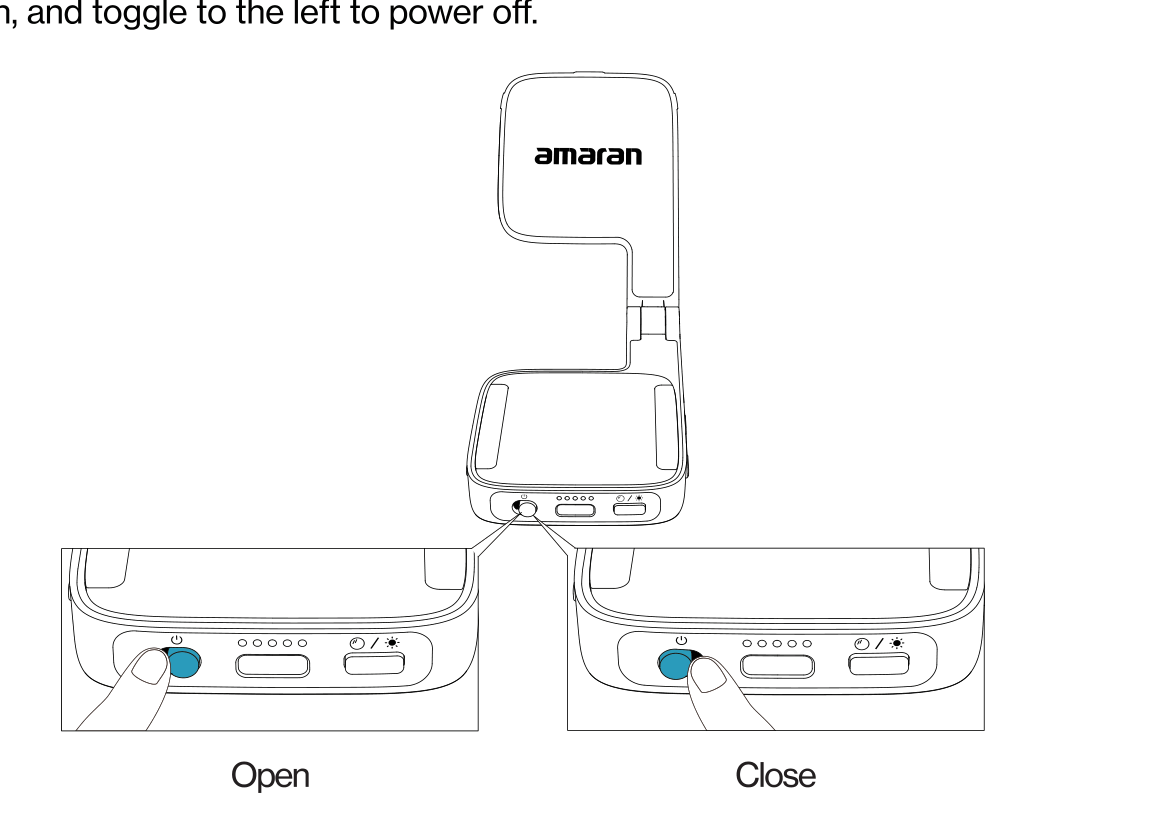
When the light is powered on, the indicator light displays the current battery level in 20% increments. See [amaran Go] Operation & Controls for how to read the indicator light.