.png?width=200&height=32&name=Logo_amaran_Blue_20240811a%20(3).png)
This guide covers powering, mounting, and first power-on for the amaran Ray family. The compact Ray 60c and 120c and the Ray 360c and 660c monolights differ mainly in how they draw power and mount, so both are covered below. For a full breakdown of the on-screen menu, see [amaran Ray] Operation & Controls.
Powering the light
Ray 60c and 120c (compact)
The compact models support three power input methods:
- DC input: Powered via the included AC to DC Power Adapter. The Ray 60c accepts 12 to 24V (max 75W); the Ray 120c accepts 12 to 20V (max 84W) or 21 to 24V (max 140W).
- USB-C PD: Powered by a PD-supported USB-C supply. The Ray 60c supports up to 20V/3.75A (75W); the Ray 120c supports up to 28V/5A (140W).
- amaran Ace E-Lock: Wireless, cable-free power from the amaran Peak 75 or amaran Peak battery system. On the Ray 120c, the amaran Peak 75 limits output to 50% power, while the amaran Peak runs it at full power.
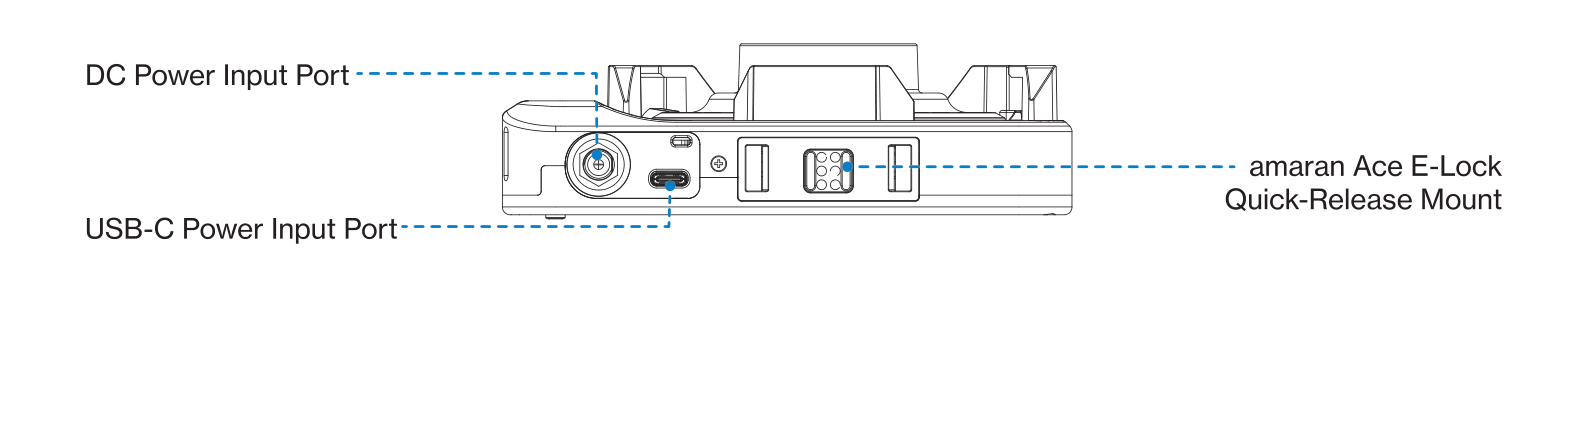
Note: The amaran Peak 75 and amaran Peak battery systems are sold separately. Always use a power source that meets the rated power requirements. A supply that falls short may limit maximum brightness or cause the fixture to power on or operate unstably.
Ray 360c and 660c (monolight)
Insert one end of the AC power cable into the light's AC power input port, and the other end into an AC power outlet (100V to 240V). Ensure both plugs are securely connected before use.
Power on and off
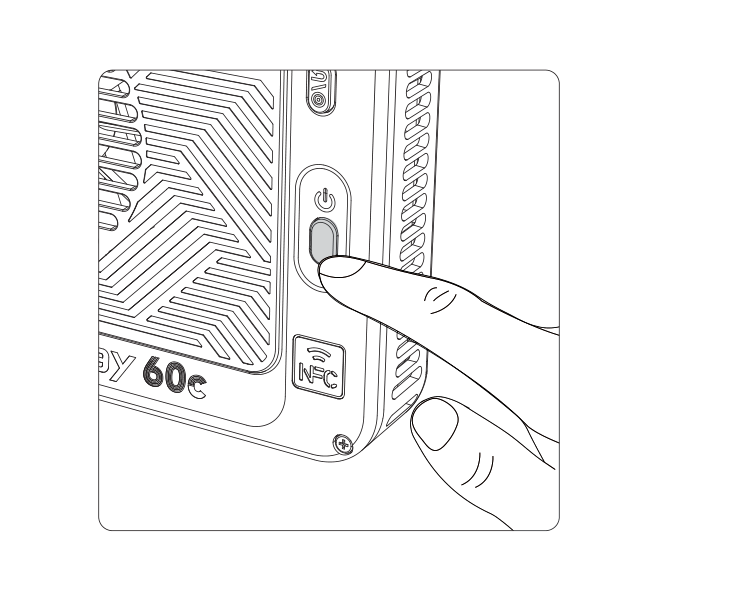
- Ray 60c / 120c: After connecting power, double-press the Power Button to turn the light on. Double-press again to turn it off.
- Ray 360c / 660c: After connecting power, toggle the Power Switch at the bottom of the light to turn it on or off.
The first time you power on any Ray, a language prompt appears. Rotate the FlowTurn knob to choose English or Chinese, then press the Confirm button to set it.
Mounting the light
Ray 60c and 120c
The compact models offer several mounting options:
- 1/4-20in screw mount for tripods and other equipment.
- Full-size Bowens mount for standard Bowens accessories.
- amaran Ace Lock to Baby Pin Adapter Grip: Align the contact pins on the grip with the light's Ace Lock quick-release mount, press the blue release key, and push toward the bottom of the light until you hear a click. Ensure the blue release key faces the back of the light to avoid reverse installation.
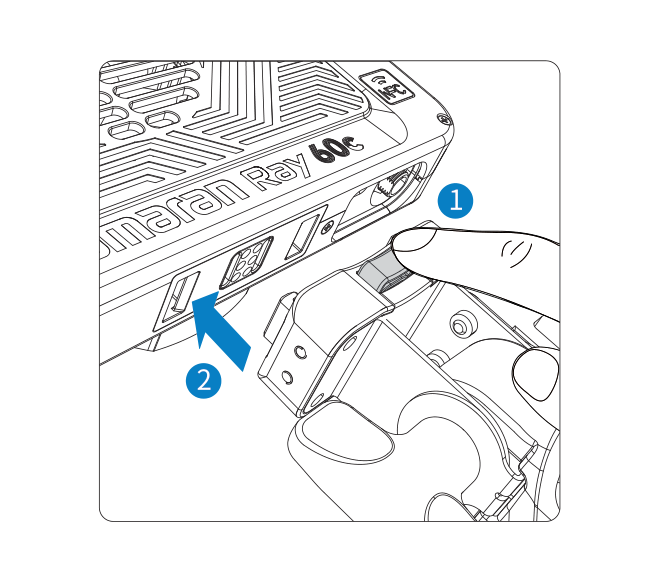
The grip's front silicone strap secures external power sources such as adapters, V-mount batteries, or power banks, and the bottom includes a Baby Pin mount that fits compatible light stands with a locking screw.
Ray 360c and 660c
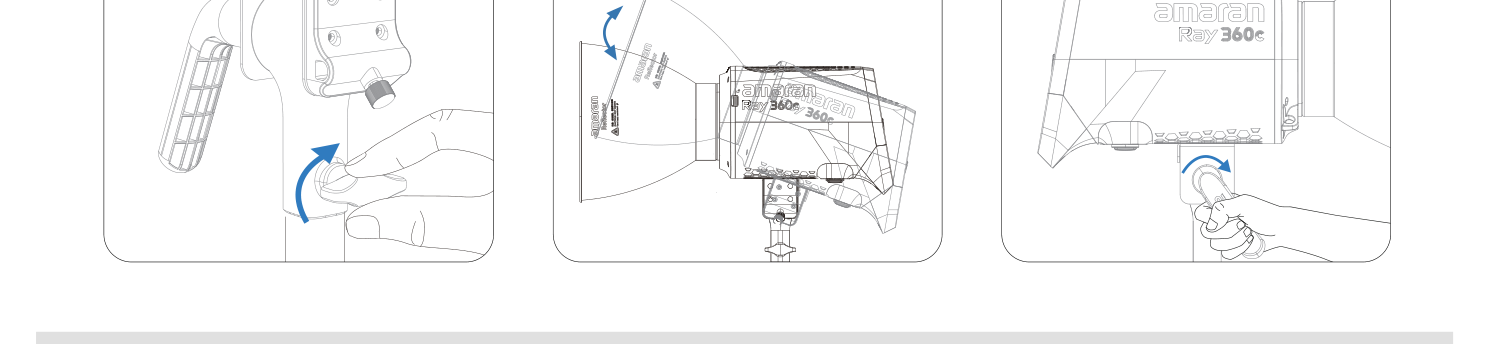
With the mounting bracket installed on the light, place the end of the bracket onto the light stand and turn the locking knob to secure it. Adjust the angle of the light, then turn the tilting bracket knob to lock it in place. A safety cable hole is provided for added security.
Attaching modifiers
- Ray 60c / 120c: The fixture comes with the amaran Octa Dome 30 pre-installed. The softbox uses a one-snap design: pull up the expansion handle to fully open it and ensure it locks, then adjust the diffusion cloth and grid as needed. To collapse it, press the release latch on the softbox mount and let it fold down. To swap accessories, press the Bowens Mount Release Button while rotating the accessory or fixture to detach.
- Ray 360c / 660c: The fixture uses a full-size Bowens mount. Always remove the blue protection cover before attaching a modifier, since turning the light on with the cover in place may cause heat damage. To install, align and insert the cover or modifier into the Bowens mount and rotate clockwise until the release button pops out. To remove, press and hold the release button, then rotate counterclockwise.